
Installing a natural stone or marble mantel surround gives a fireplace a polished, finished look, and with the right prep it's a project most homeowners can tackle themselves in a weekend. This guide walks through the full installation, from placing the hearth and riser to anchoring the facing legs, header, and breast plate with hidden wood supports and construction adhesive, finishing with the mantel shelf on top.
Follow the steps in order and dry fit each piece before gluing, and you'll end up with a surround that's both secure and properly aligned.
Quick facts
- Steps: 12 — hearth, riser, leg supports, legs, header, breast plate, mantel shelf
- Materials: 2x4x6' lumber, construction adhesive, acrylic caulk, 8 wood screws
- Tools needed: caulk gun, level, power drill, tape measure
- Anchoring method: 6" wood blocks glued to the back of each leg, matched to blocks screwed into the wall
- Wall marking: 1-1/2" out from the leg guide line for the wall-side support blocks
- Best practice: dry fit every piece (riser, legs, header, breast plate, shelf) before applying adhesive
You will need the following tools and materials to build your mantel:
- 2 x 4 x 6'
- Acrylic Caulk
- Caulk Gun
- Construction Adhesive
- Level
- Power Drill
- Tape Measure
- Wood Screws (8)
Step 1 - Mark the center of the firebox and the wall.
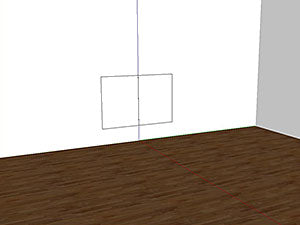
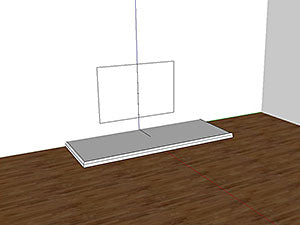
Step 2 - Measure the width of the hearth and mark the center. Dry fit and mark for placement. Apply construction adhesive to the back of the hearth. Set the hearth stone in place and align the center marks.
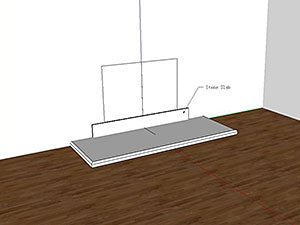
Step 3 - Locate the riser piece (if using) and dry fit it on top of the hearth. It may need to be cut to the proper size to cover the space between the hearth and the underside of the firebox if you did not order a custom sized mantel.
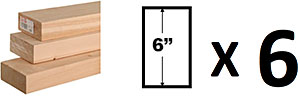
Step 4 - Cut one 2x4 wood stud into six pieces, each piece should be no longer than 6" long.
Step 5 - Use construction adhesive to secure one piece of wood into the back of the fireplace leg, near the top of the leg. (see diagram)
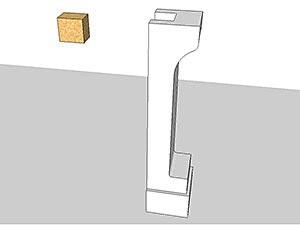

Step 6 - Measure the underside of the mantel shelf to determine the width from outside leg to outside leg. Center this dimension on the firebox and mark each side as a guide for the outside of each leg
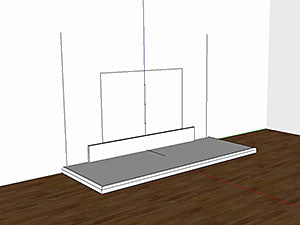
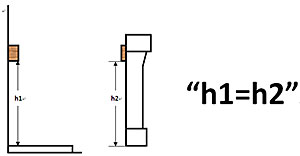
Step 7 - Measure to the top of the piece of wood you secured to the back of the mantel leg. Measure from the top of the hearth vertically up the wall on each side and mark 1.5" away from the line marking the outside of the mantel leg. Take two of the smaller wood lengths you cut earlier and screw them into the wall, securing firmly. These pieces will need to match up with the pieces at the back of the mantel leg.

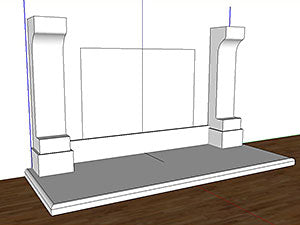
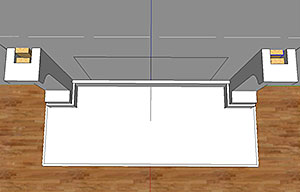
Step 8 - Dry fit the two facing legs on the inside of each installed mantel leg to assure a good fit. Remove, apply construction adhesive to the back of each leg and secure to the wall.

Step 9 - Dry fit the facing header on top of each installed facing leg to assure a good fit. Remove, apply construction adhesive to the back of the header and secure to the wall.
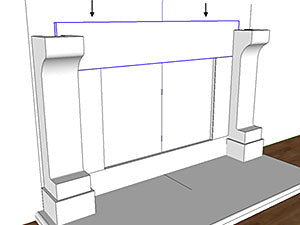
Step 10 - Take two pieces of the wood you cut earlier and secure each to connect the wood blocks on the back of the mantel leg and the wall. (see diagram)
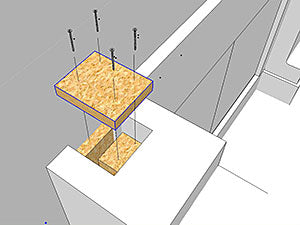
Step 11 - Locate the mantel breast plate and dry fit to confirm fit. Apply construction adhesive to the top edge of the mantel leg and secure it.
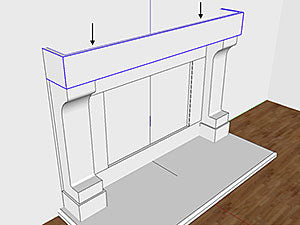
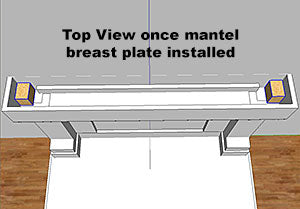
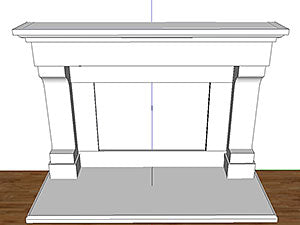
Step 12 - Dry fit mantel shelf on top of mantel breast plate. Apply construction adhesive to the top of the breast plate and set mantel shelf on top.
Frequently Asked Questions
What tools do you need to install a marble or natural stone mantel surround? A 2x4x6' piece of lumber, construction adhesive, acrylic caulk with a caulk gun, a level, a power drill, a tape measure, and 8 wood screws.
How many steps does it take to install a stone mantel surround? It's a 12-step process, covering hearth placement, riser fitting, leg and header attachment via hidden wood supports, the breast plate, and finally the mantel shelf.
Why do wood blocks get attached behind the mantel legs during installation? Small blocks cut from a 2x4 (six pieces, each 6" or shorter) are glued to the back of each mantel leg and matched to blocks screwed into the wall. This hidden anchor point is what actually holds the stone legs in place.
Where do you mark the wall when installing mantel legs? Measure up from the top of the hearth on each side and mark a line 1-1/2" out from the guide line for the outside of the mantel leg — that's where the wall-side wood support blocks get screwed in.
Should you dry fit stone mantel pieces before gluing them? Yes. The riser, facing legs, header, breast plate, and mantel shelf should each be dry fit first to confirm placement before any construction adhesive goes on.
What adhesive is used to install a stone mantel surround? Construction adhesive secures the hearth, facing legs, header, breast plate, and mantel shelf. Acrylic caulk is used separately for finishing joints.